With Shopify, it’s simple to create an online store. Importing products via CSV is one way to speed up that procedure. Comma-separated values files, or CSV files, store tabular data (numbers and text) as plain text. Instead of copying and pasting lorem ipsum text into product descriptions and looking for images, importing product data via CSV can speed up the design process.
The first step toward online success for many business owners is opening a Shopify store. Using Shopify’s user-friendly website building environment, it is quick and easy to start making online sales. With templates, you can create a stunning brand image while also having access to a wide range of practical add-ons and plugins from the Shopify store.
Contents
How to Upload Products on Shopify Effectively?
According to your requirements, you can add or alter the product information. The methods that demonstrate how to add products on Shopify efficiently are shown below:
- Step 1: Go to the navigation bar on the left after logging into Shopify admin. Select “Products” from the menu in the bar. Select the option that says “All Products” from the list.
- Step 2: Simply click the “Add Product” button on the top of the product page.
- Step 3: Enter the product’s title and any further information. You are now prepared to begin adding content to your product page. Details about your product will comprise items like:
- Product Title
- Description
- Product Type
- Vendor
- Step 4: Select the “Save” button on the right top.
How to import a CSV file of products
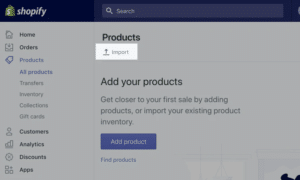
Go to the Products page in the Shopify admin and click Import in the top left corner of the page, under the page title, to begin a product CSV import:
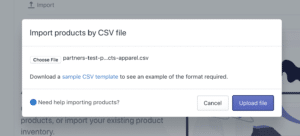
When you click on import, a modal window with the choice to upload a CSV file will appear.
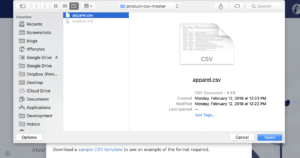
Select the product CSV file you want to use for your store by clicking the Choose File button. In this article, we’ll use the apparel.csv file as an example.
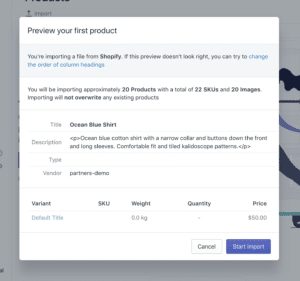
Click File Upload. Click Start import to begin importing the CSV file once you’ve made sure the data you’re importing appears correct in the preview (that is, your product’s title, description, and type are all displayed correctly).
The import should fill your store in less than five minutes, depending on the CSV you choose to upload. When the import is complete, the imported products will appear in your store with accurate product descriptions, variants, and thumbnails. You can begin developing the store’s theme using authentic images and data with this newly populated data and test all the variations.
A product imported to the store via a CSV file is shown above. Here is the same item in View using Shopify’s free Debut theme:
How to Add Products on Shopify POS
You can add new products from the Products screen in the Shopify POS. Other sales channels won’t display them until you change your settings. For Shopify POS items to be made, an internet connection is required. Click the + button and select Add product to add a new product here.
In the add product window, you can enter information about the product, such as its price, title, and inventory status. The front-facing camera on your POS system can also be used at that time to take a picture of the product. Remember to hit the picture option and choose an image from your files if you want to add a product image.
Tap on Save product when ready to make this one item available for checkout. As a result, the item will appear on the Shopify website’s products page and the POS’s checkout screen. As an admin with Shopify, you can open a product from the Products page and make changes or delete it. Direct product deletion or editing is not possible in Shopify.
With the information mentioned above, you now know how to add products on Shopify POS and upload products on Shopify.
To learn more about how this can be done, visit the BIE website immediately.

